


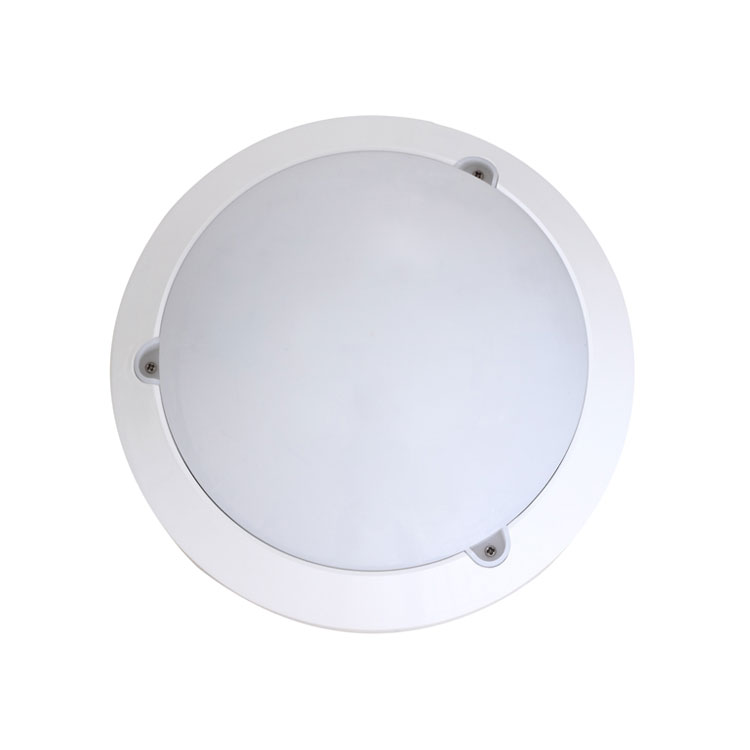
Microwave Sensor Light
Welcome to buy Microwave Sensor Light from us. Every request from customers is being replied within 24 hours.
Model:PD-FL2004
Send Inquiry
Product Details
Microwave Sensor Lamp PD-FL2004 instruction
PRODUCT INFORMATION
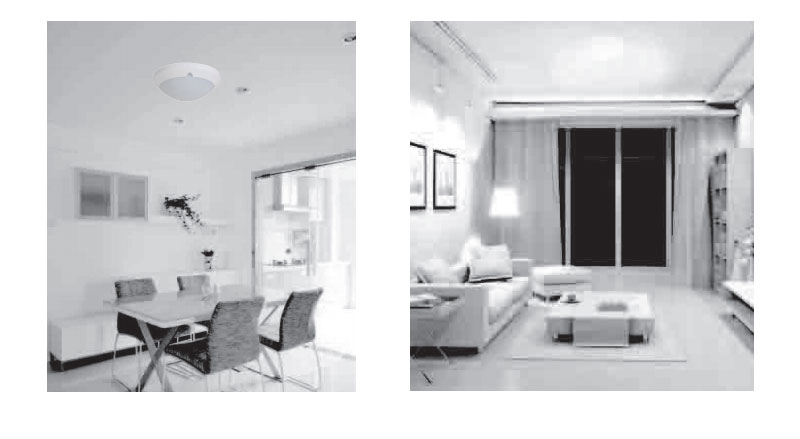
This product have adopted energy-saving light - fluorescent light with a higher power load, and its compact appearance makes it looks elegant with simple features. We can say that It concentrates both advantages of daylight lamp and incandescent lamp for it’s features of energy-saving, long lifetime ,small size and good show color. In addition to those, the using of microwave sensor makes the product more human-based and energy-saving and the product can be widely used in indoor and corridor renovation with the high product protection level of IP44.

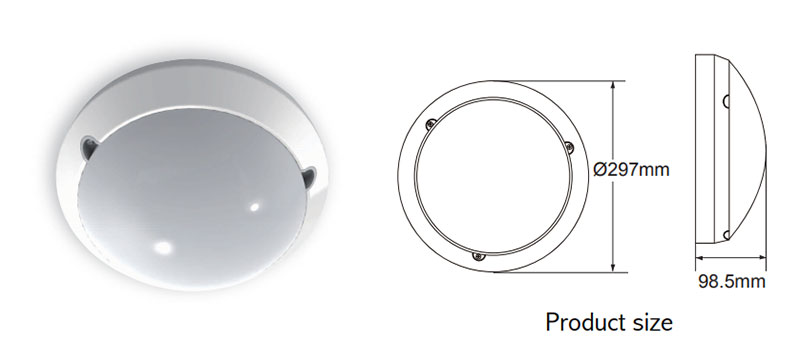
NAME OF EACH PART

SPECIFICATIONS
|
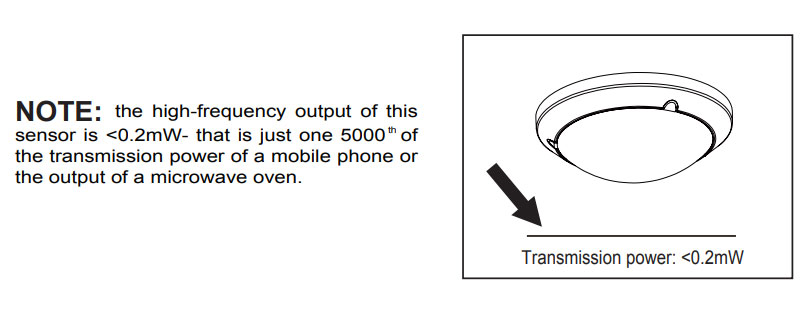
Power source: 220-240V/AC Power frequency: 50Hz HF system: 5.8GHz CW electric wave, ISM wave band Transmission power: <0.2mW Rated load: 18W Max. Detection angle: 360° Luminous flux: 767 lm |
Detection range: 2m; 5m; 8m; 10m(radii) (adjustable) Time setting: 6s; 1min; 3min; 5min; 10min; 15min (adjustable) Light-control: <10LUX; 100LUX; 300LUX; 2000LUX (adjustable) Standby power: <0.9W Net weight: about 0.858kg Installation: ceiling mount |
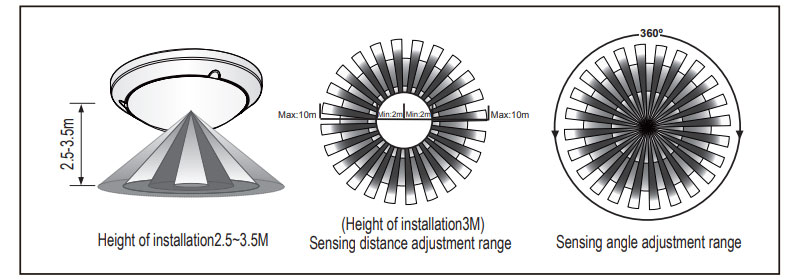
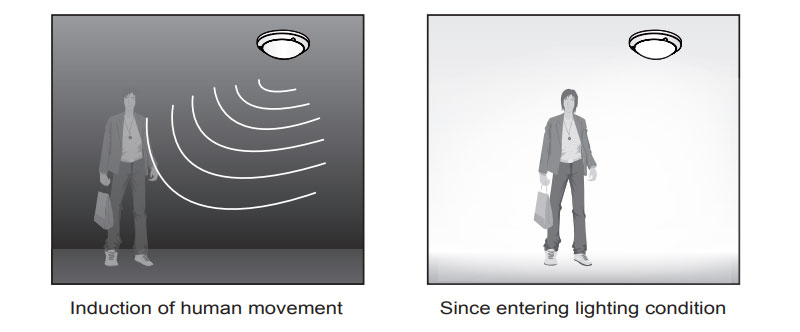
INDUCTION RANGE
PROCEDURE OF INSTALLATION

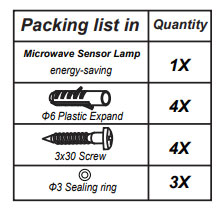
Note:Please bring the following tools

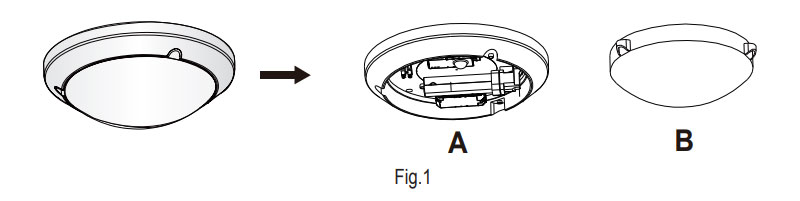
• Step1 Turn off the screw to take down the lampshade (as follow: the product should be separated into two parts as A and B)
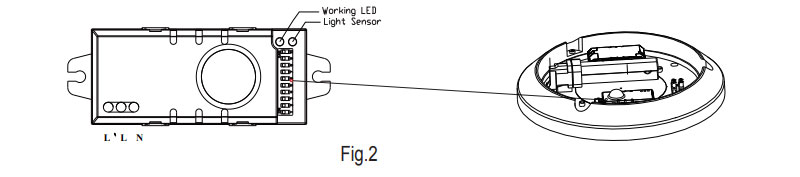
• Step2 Turn the knobs to the ideal conditions (as Fig.2)
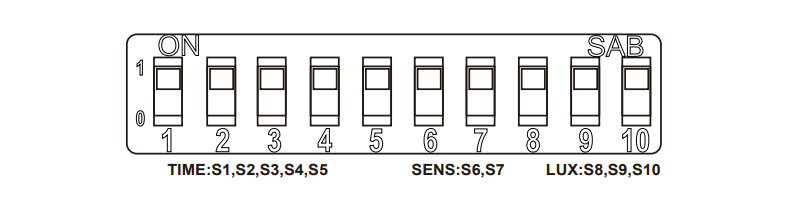
Parameter setting
Shown as chart below:By setting the S1, S2 ,S3 ,S4,S5 to set the delay time of products,by setting S6,S7 to set the detection range of products, by setting the S8,S9,S10 to set the light-control of products.
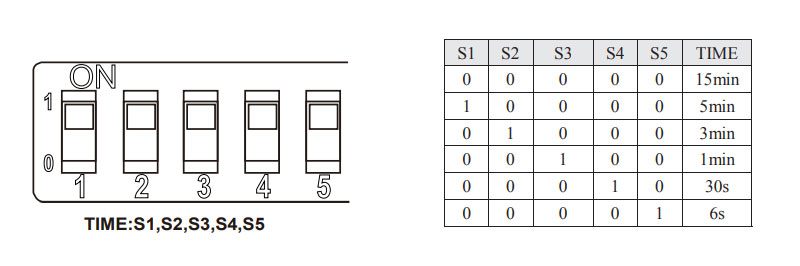
Time setting
The light can be set to stay ON for any period of time between approx. 6sec and a maximum of 15 min.
Any movement detected before this time elapse will re-start the timer.It is rec ommended to select the shortest time for adjusting the detection zone and for performing the walk test.Pull switch to the ON position as "1", pull switch to the OFF position as "0”, switch location and detection range of the corresponding table is as follows:
Detection range setting (sensitivity)
Detection range is the term used to describe the radii of the more or less circular detection zone produced on the ground after mounting the sensor light at a height of 2.5m, pull switch to the ON position as "1", pull switch to the OFF position as "0”, switch location and detection range of the corresponding table is as follows:

Attention
When use this product, please adjust the sensitivity to an appropriate position you need, please do not adjust the sensitivity to maximum, to avoid the product does not work normally caused by wrong motion.Because the sensitivity is too high easily detect the wrong motion by wind blowing leaves & curtains, small animals, and the wrong motion by interference of power grid & electrical equipment. All those lead the product does not
work normally !
When the product does not work normally, please try to lower the sensitivity appropriately, and then test it.
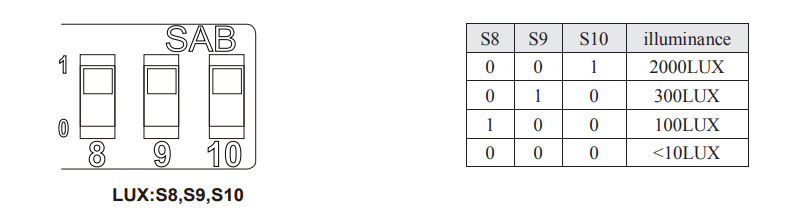
Light-control setting
The chosen light response threshold can be infinitely from approx. 10-2000lux, pull switch to the ON position as "1", pull switch to the OFF position as "0”, switch location and detection range of the corresponding table is as follows:
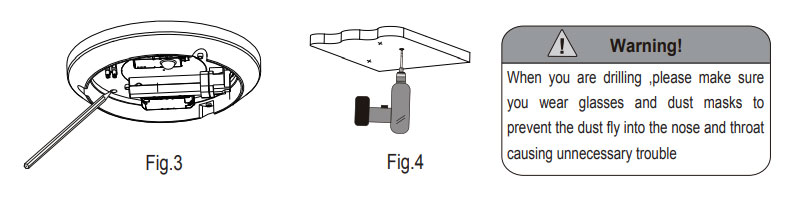
• Step3 Put the base of the product on the ceiling to make the drilling mark (as Fig.3)
• Step4 Install the product on the place where you marked (as Fig.4)
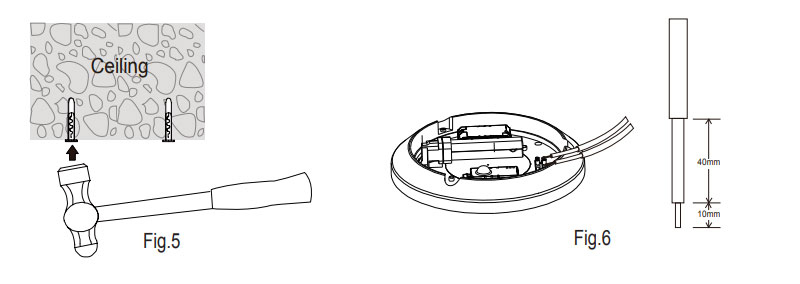
• Step5 Knock the plastic expansion screw into the hole which you drill (as Fig.5)
• Step6 Put the power line through the line hole to connect on the wiring (as Fig.6)
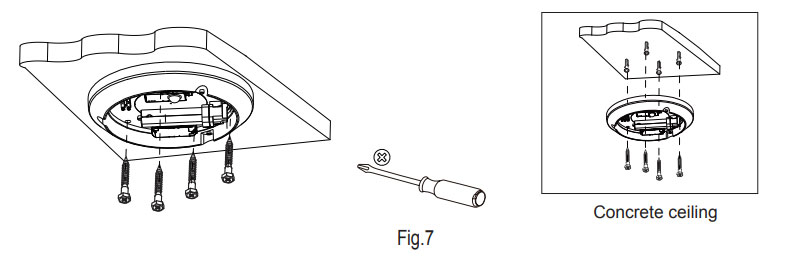
• Step7 Fix the base of the product on the selected place with the screws (as Fig.7)
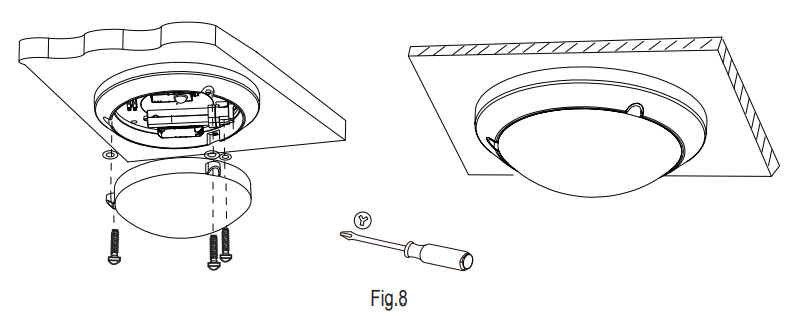
• Step8 Fix the PC lampshade on the base with the screws (as Fig.8)
FAULT AND THE SOLUTION
| Fault | Failure cause | Solution |
| Does not work with the load | Light-illumination set incorrectly, the load is broken | Adjust the setting of the load |
| The power is off | Change the load | |
| There is a continuous signal in the region of the detection | Turn the power on | |
| Work all the time with the load | The sensor have not been installed correctly | Check the settings of the detection area |
| When there is no a moving signal work with the load | Sensors failed to pack good cause its cannot reliably detect signal | Re-install the outer covering |
| Moving signal is detected by the sensor (movement behind the wall, the movement of small objects, etc.) | Check the settings of the detection area | |
| When there is a moving signal work with the load | The moving body is too fast or the detection area is too small | Check the settings of the detection area |

Please confirm with profession installation.
Please cut off power supply before installation and removal operations.
Make sure that you have cut off the power for safety purposes.
Improper operation caused losses, the manufacturer does not undertake any responsibility.


